¡Hola! Si está buscando establecer su software de cliente de correo de escritorio como su tienda de correo electrónico predeterminada, ¡ha venido al lugar correcto!
Logicboxes Los correos empresariales / empresariales se pueden configurar en varios clientes de correo electrónico como Outlook, Outlook Express, Thunderbird, Windows Mail, Windows Live Mail, Apple Mail, etc.

Los clientes de correo enumerados a continuación contienen instrucciones sobre cómo configurar su cuenta de correo para los clientes de correo especificados.
- Microsoft Outlook 2007
- Microsoft Outlook 2010
- Microsoft Outlook 2013
- Outlook Express
- Mozilla Thunderbird
- Windows Live Mail
- Apple Mail 3.6 (Leopard)
- Apple Mail 4.0
- Apple Mail 8.0 en adelante
Configuración de la cuenta de correo electrónico en Microsoft Outlook 2007
Para enviar y recibir correos electrónicos usando Microsoft Outlook 2007, debe configurar su cuenta como se describe a continuación:
- Inicie Microsoft Outlook 2007. Haga clic en el menú Herramientas y seleccione Configuración de la cuenta ...
- En la pestaña Correo electrónico, haga clic en Nuevo ...
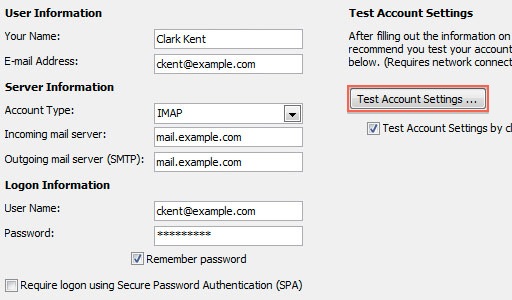
- Complete todos los campos necesarios para incluir la siguiente información:
- Su nombre: ingrese su nombre como desearía que aparezca en el campo De: de los mensajes salientes.
- Dirección de correo electrónico: ingrese su dirección de correo electrónico completa ( usuario@somedomainname.com ).
- Contraseña: ingrese su contraseña de correo electrónico.
- Configure manualmente la configuración del servidor o los tipos de servidor adicionales: Seleccione esta casilla de verificación y haga clic en Siguiente.
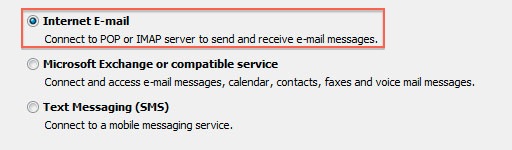
- En el mensaje para elegir el servicio de correo electrónico, seleccione el correo electrónico de Internet para conectarse a su servidor POP , IMAP o HTTP para enviar y recibir mensajes de correo electrónico. Haga clic en Siguiente .
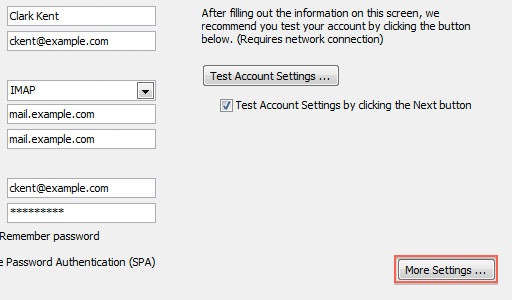
- En el cuadro de diálogo Configuración de correo electrónico de Internet , verifique su información de usuario e ingrese los siguientes detalles adicionales:
- información del servidor
- Tipo de cuenta: seleccione POP3 o IMAP
- Servidor de correo entrante y saliente: puede obtener esta información desde su Tablero de correo electrónico. En Panel, vaya a Correo> Configuración DNS y registros POP / IMAP / SMTP . O si está utilizando nuestro servicio de DNS para su dominio, puede utilizar: Servidor de correo entrante: pop.su-nombre-de-dominio (por ejemplo: pop.demomonkey.org)
Servidor de correo saliente: smtp.nombre-de-dominio (por ejemplo: smtp.demomonkey.org) *** Para la configuración de IMAP,
Tipo de cuenta: IMAP
Servidor de correo entrante: imap.your-domain-name (por ejemplo: imap.demomonkey.org)
Servidor de correo saliente: smtp.your-domain-name (ej. : smtp.demomonkey.org)
- información del servidor
- Información de inicio de sesión
- Nombre de usuario: ingrese su nombre de usuario completo (igual que su dirección de correo electrónico)
- Contraseña: ingrese su contraseña de correo electrónico
- Requerir el inicio de sesión utilizando Secure Password Authentication (SPA): deje esta opción sin marcar.
- Haga clic en Más configuraciones ... y seleccione Servidor saliente
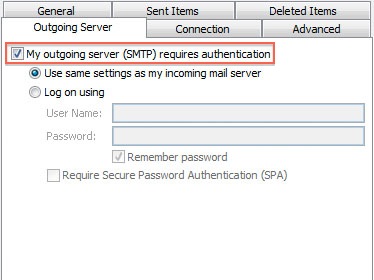
- Marque la casilla junto a Mi servidor de salida (SMTP) requiere autenticación y asegúrese de que la opción Usar la misma configuración que mi servidor de correo entrante esté seleccionada .
- Haga clic en Aceptar y luego Siguiente
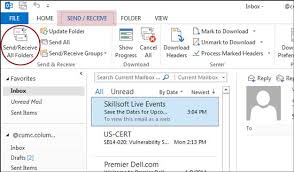
Eso es todo, ¡tu cuenta ha sido configurada! Cuando hace clic en Enviar / Recibir, Outlook 2007 descargará todo su correo electrónico.
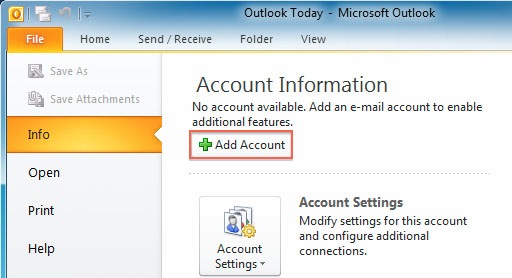
Configuración de la cuenta de correo electrónico en Microsoft Outlook 2010

& then click More Settings.** Please note that the Domain Name used for the configuration here is ‘q.com’For Free Email Service / Email Hosting Plans
Incoming & Outgoing mail server: You can obtain this information from your Email Dashboard. In Dashboard go to Mail > DNS Configuration and POP/IMAP/SMTP records. Or if you are using our DNS service for your domain then you can use:
Incoming Mail Server: pop.your-domain-name (eg: pop.demomonkey.org)
Outgoing Mail Server: smtp.your-domain-name (eg: smtp.demomonkey.org)***For IMAP configuration,
Account Type: IMAP
Incoming Mail Server: imap.your-domain-name (eg: imap.demomonkey.org)
Servidor de correo saliente: smtp.your-domain-name (p. Ej .: smtp.demomonkey.org)

y luego coloque la viñeta al lado de "Usar la misma configuración que mi servidor de correo entrante".
al 587, cambie la conexión cifrada a Ninguna y luego haga clic en Aceptar. Marque Dejar una copia de los mensajes en el servidor según sus preferencias. *** Para la configuración POP,
Número de puerto del servidor entrante (POP): 110 Número de puerto del servidor
saliente (SMTP): 587 *** Para la configuración IMAP,
entrante (IMAP) Número de puerto del servidor: 143
Saliente (SMTP) Número de puerto del servidor: 587
Haga clic en Siguiente.
Puede intentar enviar un correo electrónico de prueba y probar la configuración de la cuenta.
Configuración de la cuenta de correo electrónico en Microsoft Outlook 2013
- Cuando abra por primera vez Outlook, proporcionará un mensaje de " Bienvenido a Outlook 2013 ", haga clic en el botón Siguiente .
- La siguiente pantalla preguntará " ¿Desea configurar Outlook para conectarse a una cuenta de correo electrónico? "Elija Sí y haga clic en el botón Siguiente .
- En el menú Configuración de cuenta automática , seleccione la opción Configuración manual o tipos de servidor adicionales , luego haga clic en Siguiente .

En el menú Elegir servicio , haga clic en la opción POP o IMAP y luego haga clic en el botón Siguiente .
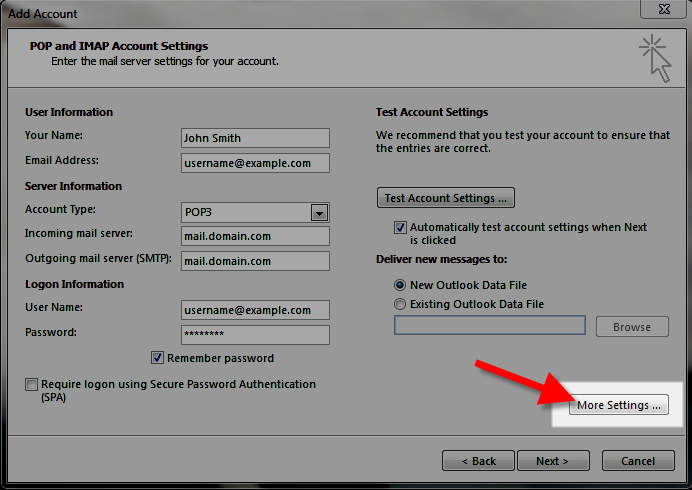
Luego verá el menú Configuración de la cuenta POP e IMAP, complete los campos.
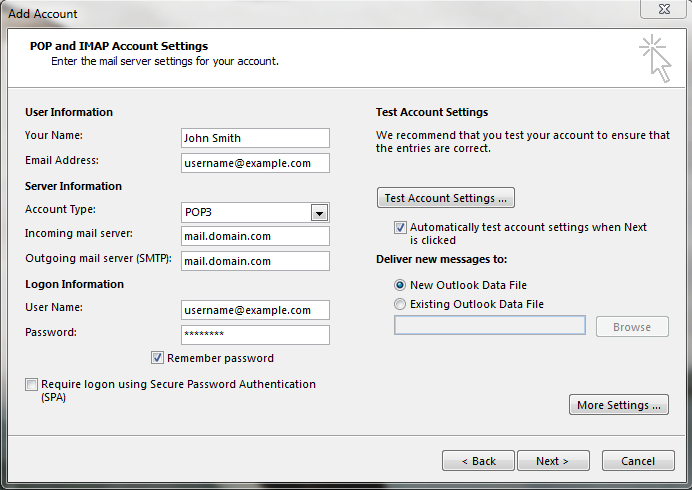
A continuación hay una descripción de los campos:
| Opción | Descripción |
|---|---|
| Tu nombre | Ingrese el nombre que desea que las personas a las que envíe por correo electrónico, como por ejemplo: John Smith |
| Dirección de correo electrónico | Ingrese su dirección de correo electrónico completa, como: nombredeusuario@ejemplo.com |
| Tipo de cuenta | Elige si quieres usar POP o IMAP . De forma predeterminada, POP descarga y elimina sus correos electrónicos del servidor, mientras que IMAP los deja en el servidor. En nuestras pruebas, estamos configurando una cuenta POP. |
| Servidor de correo entrante | Configuración estándar: imap.domain.com O pop.domain.com (Reemplazar domain.com con su dominio real) |
| Servidor de correo saliente (SMTP) | Configuración estándar: smtp.domain.com (Reemplazar domain.com con su dominio real) |
| Nombre de usuario | Ingrese su dirección de correo electrónico completa, como: nombredeusuario@ejemplo.com |
| Contraseña | Ingrese la contraseña para esta dirección de correo electrónico. |
| Recordar contraseña | Recomiendo marcar esta casilla, por lo que Outlook guardará su contraseña. |
| Requiere inicio de sesión usando (SPA) | No marques esta casilla. |
- Haga clic en el botón Más configuraciones .
- Haga clic en la pestaña Servidor saliente .
Verifique " Mi servidor de salida (SMTP) requiere autenticación ".
Marque " Usar la misma configuración que mi servidor de correo entrante ".

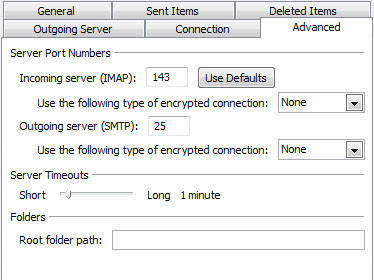
- Haga clic en la pestaña Avanzado. Ingrese su configuración, a continuación encontrará una descripción de las opciones disponibles.
Opción Descripción Servidor entrante Elija su configuración preferida, a continuación se muestran las opciones disponibles.Estándar (POP3): 110Estándar (IMAP): 143SSL (POP3): 995SSL (IMAP): 993Este servidor requiere una conexión encriptada (SSL) Haga clic aquí si está utilizando la opción SSL. Servidor de salida Estándar: 25 * o 587SSL: 465* Muchas veces, los ISP bloquearán este puerto para usarlo con su correo electrónico. Es posible que desee considerar el uso del puerto 587 o la configuración segura.Use el siguiente tipo de conexión cifrada: Estándar: NingunoSSL: SSL - Haga clic en el botón Aceptar .
- Haga clic en el botón Siguiente , Outlook probará la configuración de la cuenta.
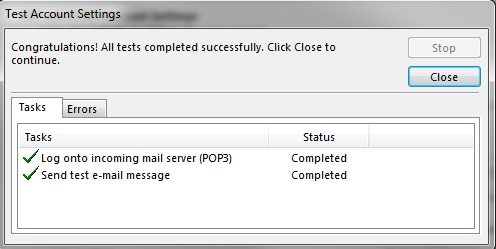
- Verá dos tareas: iniciar sesión en el servidor de correo entrante y enviar un mensaje de correo electrónico de prueba . Cuando estén completos, cierre el botón.
- Verá un mensaje que dice "¡Ya está listo!", Haga clic en el botón Finalizar .
Configurar la cuenta de correo electrónico en Microsoft Outlook Express
Siga los pasos que se detallan a continuación para usar Microsoft Outlook Express 6.0 para enviar / recibir correos electrónicos desde su cuenta de correo electrónico.
- Inicie Outlook Express 6.0. En el menú Herramientas , haga clic en Cuentas ...
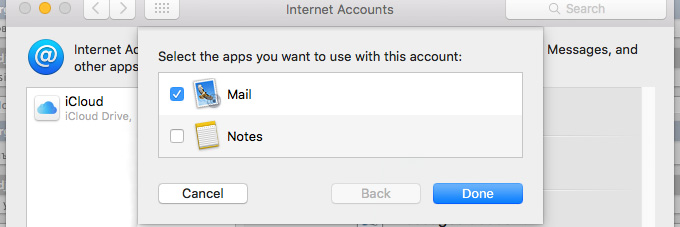
- In the Internet Accounts dialog box, click Add, and then click Mail…
- In the Display name box, type the name that you would like others to see when you send a message and then click Next.
- In the E-mail address box, type the email address for the account that you are using (for example, user@somedomainname.com) and then click Next.
- Under E-mail Server Names, click the appropriate incoming e-mail server type POP3/IMAP (Post Office Protocol version 3 [POP3] is the default type)
- Incoming & Outgoing mail server: Incoming & Outgoing mail server: You can obtain this information from your Email Dashboard. In Dashboard go to Mail > DNS Configuration and POP/IMAP/SMTP records. Or if you are using our DNS service for your domain then you can use: Incoming Mail Server: pop.your-domain-name (eg: pop.demomonkey.org)
Outgoing Mail Server: smtp.your-domain-name (eg: smtp.demomonkey.org)***For IMAP configuration,
Account Type: IMAP
Incoming Mail Server: imap.your-domain-name (eg: imap.demomonkey.org)
Outgoing Mail Server: smtp.your-domain-name (eg: smtp.demomonkey.org)
- Incoming & Outgoing mail server: Incoming & Outgoing mail server: You can obtain this information from your Email Dashboard. In Dashboard go to Mail > DNS Configuration and POP/IMAP/SMTP records. Or if you are using our DNS service for your domain then you can use: Incoming Mail Server: pop.your-domain-name (eg: pop.demomonkey.org)
- Now, type your complete email address and password in the respective fields and click Next.
- The following window will display the success message – Congratulations, you have successfully entered all of the information required to set up your account. To save these settings, click Finish.
- Open the Internet Accounts dialog box referring to steps 1 and 2. In the Mail view, you will see the Account you have just added. Now you need to click Properties.
- Under the Servers tab, you need to check the checkbox My server requires authentication placed under Outgoing Mail Server. Once this is done, click Apply.
Your setup is complete. When you click on the Send/Receive button, your email will be downloaded by Outlook Express.
Setting up Email Account on Thunderbird
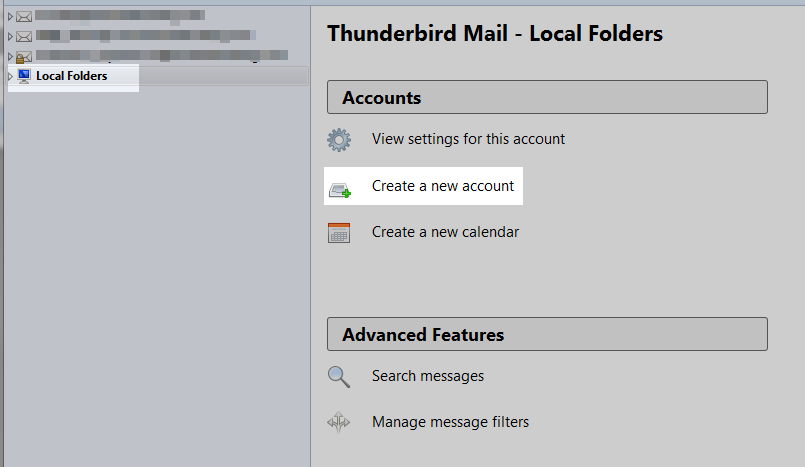
- Open up your Thunderbird email client onto your desktop
- In the left hand sidebar you will see a Local Folders. Click on the selection and the right hand panel will offer you several options. Click on the Create A New Account option.
In newer versions of Thunderbird, you will be met with a popup offering a new email account from a few sponsors. You simply need to click the button at the bottom entitled Skip this and use my existing email!

You are now taken to a page where you will enter your existing email information. After entering the information, click on the Continue button at the bottom of the page.

- Thunderbird will now try and find standard connection information to connect the email account. It is best to configure this information yourself by clicking the Manual Config button found at the bottom. Be sure to select the incoming protocol you wish to use (IMAP or POP3). You can read about the differences here. Generally speaking, IMAP is best if you plan on checking the email from multiple devices.
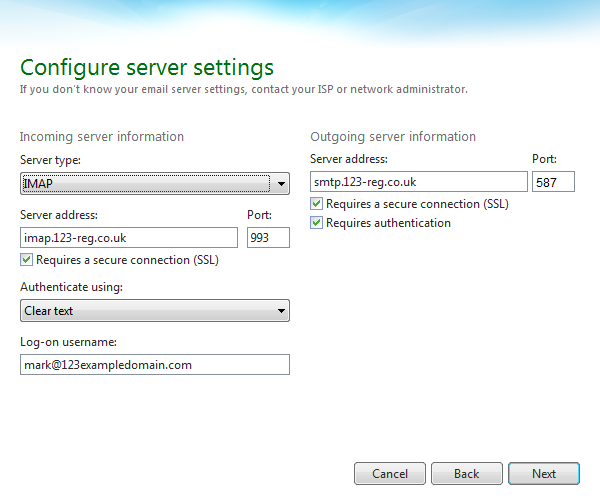
- This is the manual configuration page, where you will set up the incoming and outgoing servers and their respective ports. Once you have entered your settings, hit the Re-test button. If the settings are correct, the Done button will become available. Click it to move on to the next step.

| Server Hostname | You will need to know the servername to the email company you are using. We use smtp.<domain-name>.com where domain-name is your registered domain name.Others may use imap.mail.servername.com or pop.mail.servername.com, which are fairly standard. | ||||||||||||||||
|---|---|---|---|---|---|---|---|---|---|---|---|---|---|---|---|---|---|
| Port | Port number will change depending on your IMAP/POP choice as well as your SSL choice. Use the table below to determine which port number to use.
|
||||||||||||||||
| SSL | This is where you set your encryption settings.
|
||||||||||||||||
| Authentication |
|
||||||||||||||||
12. If you did selected the normal (unencrypted) settings, you will be presented with a popup telling you that the email connection to the server is unencrypted. You can check the I understand the risks checkbox and then click the Done button to continue.
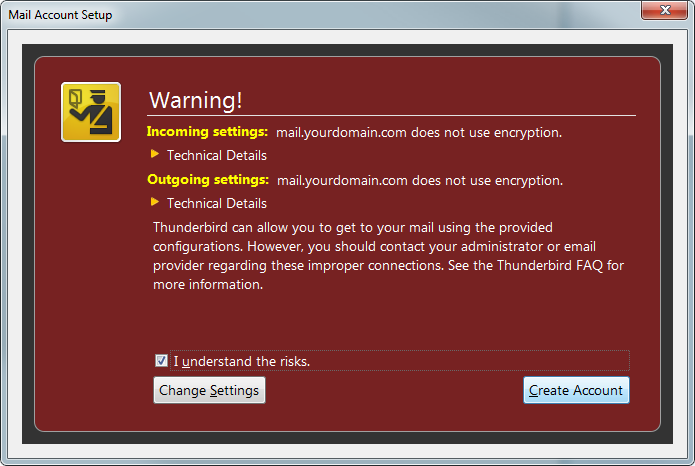
That should complete the process of adding an email address to the Thunderbird email client. You should now see your new email address in the left hand sidebar. That means it is ready for use!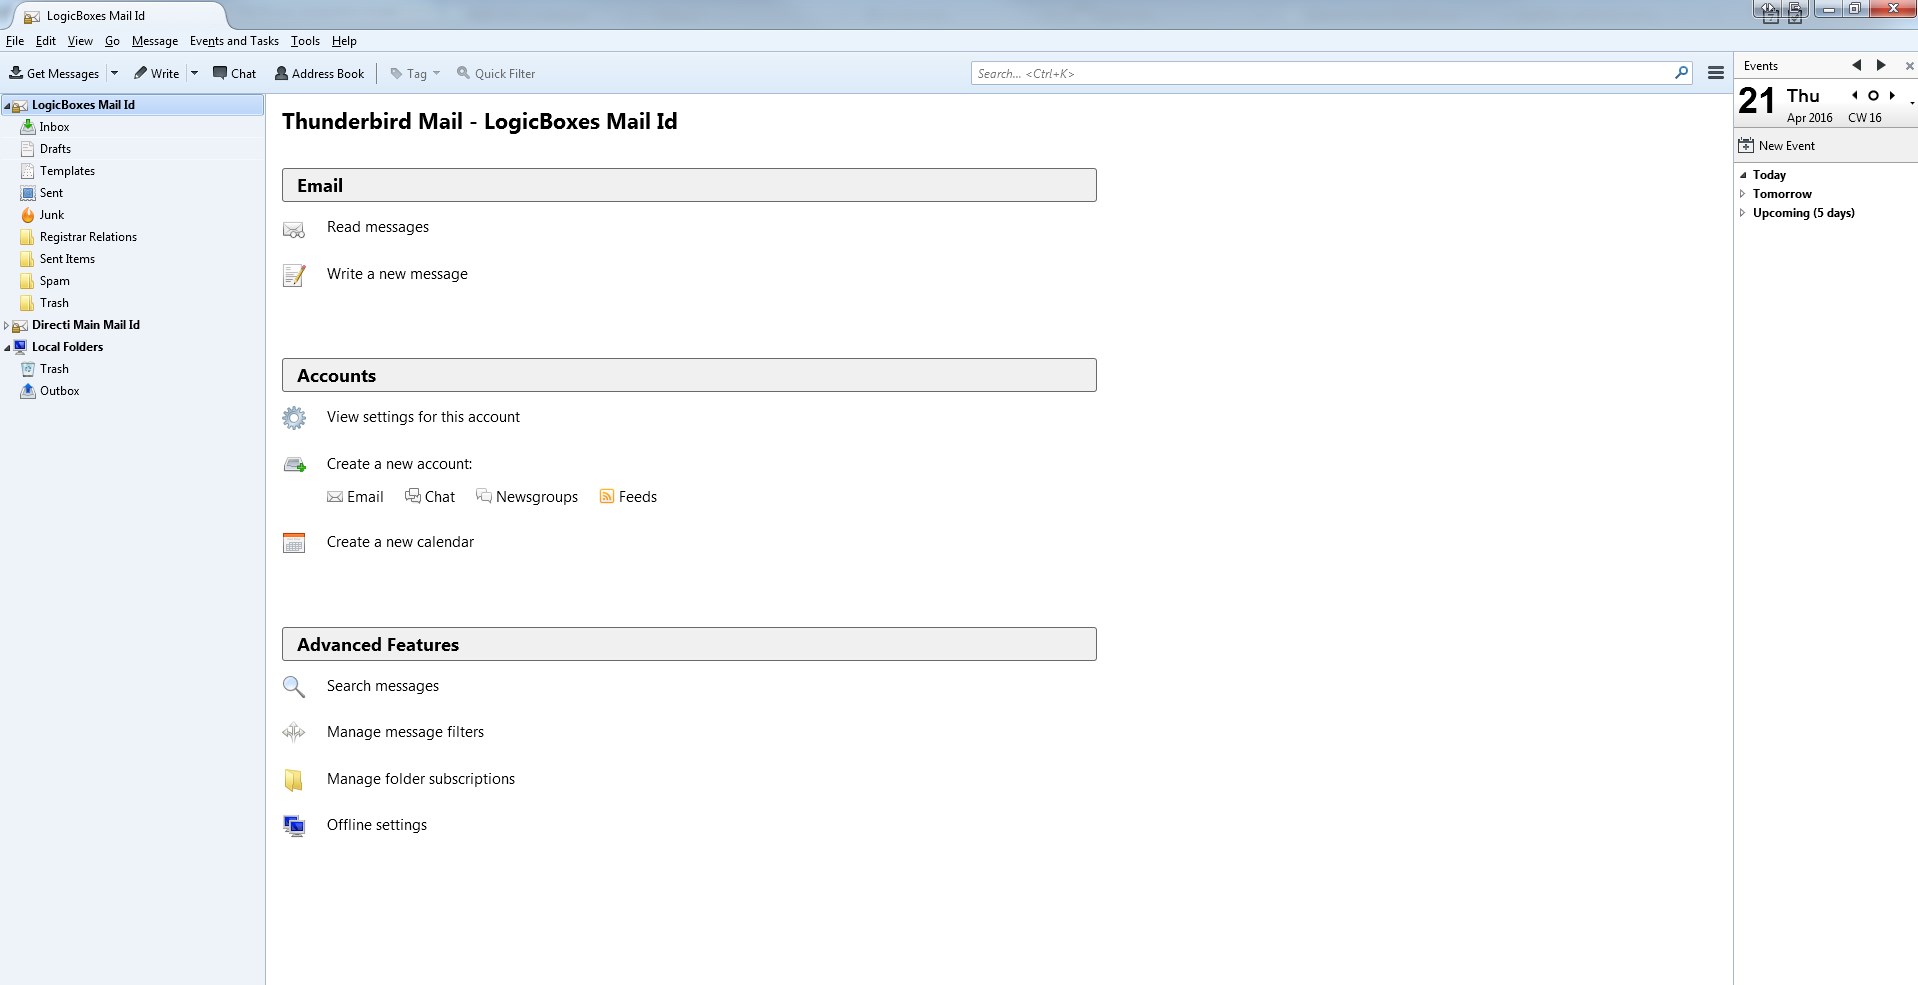
Setting up Email Account on Windows Live Mail
- Start Windows Live Mail, click on the Accounts tab and then the Email button.

2. Ingrese la dirección de correo electrónico que desea agregar, la contraseña de la dirección de correo electrónico y un nombre para mostrar preferido. Verifique la opción Configurar manualmente las configuraciones del servidor .
Una vez que se hayan ingresado estos detalles, haga clic en el botón Siguiente .

Tenga en cuenta: ahora puede elegir entre usar POP3 o IMAP . Para obtener más información sobre estos protocolos, consulte estas preguntas frecuentes .
3. Elija POP o IMAP en el cuadro desplegable. Ahora deberá ingresar imap.domain-name.com o pop.domain-name-com como la dirección del servidor.
El puerto debe establecerse en 143 para IMAP o 110 para POP3.
El puerto debe establecerse en 993 para IMAP o 995 para POP3 (conectividad segura).
Marque la opción Requiere una conexión segura (SSL) . Si usa los puertos anteriores.
Deje la opción Authenticate using como Clear text .
Finalmente ingrese el nombre de usuario de inicio de sesión, que es la dirección de correo electrónico que está agregando.

4. Ingrese smtp.123.com O smtp. <Domain-name> .com como la dirección del servidor saliente y configure el puerto como 587. Verifique que se requiere una conexión segura (SSL) y Requiere opciones de autenticación .
Una vez que se hayan ingresado todos estos detalles, haga clic en el botón Siguiente .
5. Your account has been added and you can click on the Finish button.
6. That’s it, your now ready to start sending and receiving email straight away.

Setting up Email Account on Apple Mail (version 3.6 Leopard):
Follow the steps detailed below to use Apple Mail (Leopard) to send/receive emails from your Email account:
- Go to the Mail Setup Window and choose Add Account from the File menu
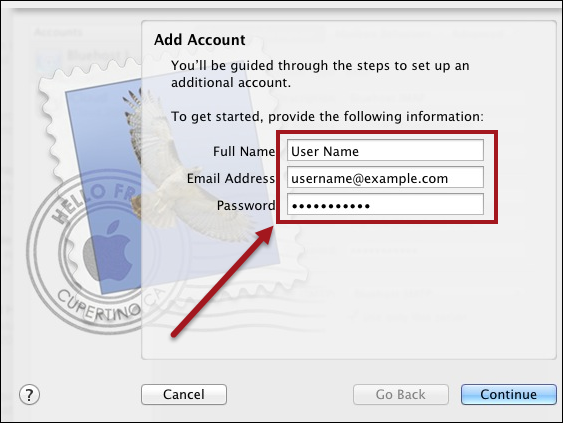
- In the Add Account box, fill in the all the necessary fields:
- Full Name: Enter your name as you would like it to appear in the From: field of outgoing messages
- Email Address: Enter your full email address (user@somedomainname.com)
- Password: Enter your email password
- Deselect the checkbox next to Automatically set up account
- Click Create
- Fill in the following Incoming Mail Server information:
- Account Type: Select IMAP/POP
- Incoming server: You can obtain this information from your Email Dashboard. In Dashboard go to Mail > DNS Configuration and POP/IMAP/SMTP records. If you are using our DNS service then you can directly use for POP pop.your-domain-name (eg: pop.demomonkey.org)and for IMAP imap.your-domain-name (eg: imap.demomonkey.org)
- Username: Enter your full username (same as your email address)
- Password: Enter your email password
- Click Continue
- Enter the following Outgoing Mail Server information:
- Outgoing Mail Server: Outgoing mail server: You can obtain this information from your Email Dashboard. In Dashboard go to Mail > DNS Configuration and POP/IMAP/SMTP records. If you are using our DNS service then you can directly use smtp.your-domain-name (eg: smtp.demomonkey.org)
- Select the box next to Use Authentication
- Username: Enter your full username (same as your email address)
- Password: Enter your email password
- Click Continue
- Verify your Account Summary and click Create
Thats it, your account has been setup! You may now send and receive all your emails using Apple Mail 3.0 (Leopard)
Setting up Email Account on Apple Mail (version 4.0):
6. Now, you have to fill in the server settings for your Email account:
- Email Address: – should be pre-filled with the value you’ve entered in the previous screen;
- Username: – enter your full email address as username. It will be used both for the incoming and outgoing connection;
- Password: – enter the password for your email account;
- Account Type: – it’s set to IMAP by default. Unless you specifically want to use POP3, please leave it that way;
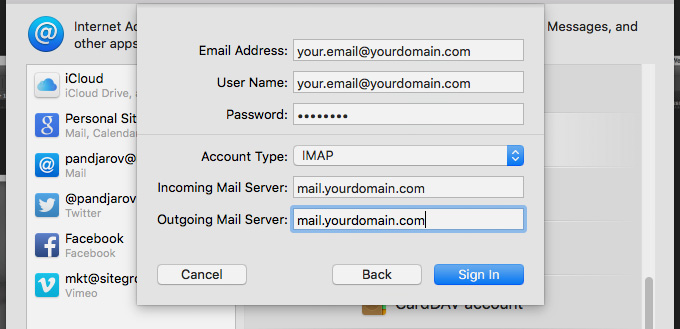
- Incoming Mail Server: – add mail.yourdomain.com unless you have a specific MX records configuration for your domain name;
- Incoming Mail Server: – same as the incoming server;
Once you fill in all the details, press Sign In to proceed.
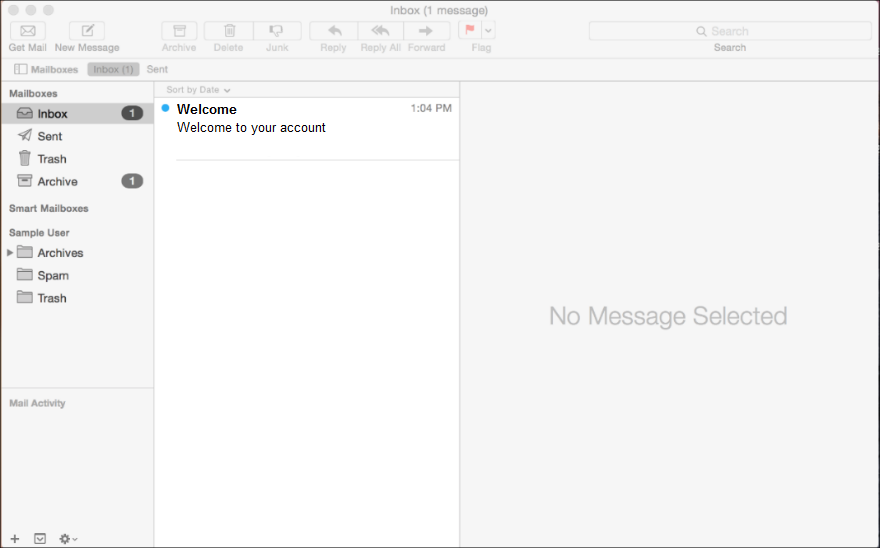
Setting up Email Account on Apple Mail (version 8 onwards):
Before You Begin
Before you set up email, make sure you have both the incoming (POP and IMAP) and outgoing (SMTP) server settings for your email provider. The settings are available from your email service provider.
Add Email Account
There are two paths to setting up email accounts in the Mac OS:
• Set up the Mail application for the first time.
• Add additional email accounts.
When you get to the Incoming Mail Server step, the directions are the same from that point forward.
Add First Account
The directions in this section are for setting up an email account for the first time. Follow these steps to set up a new email account.
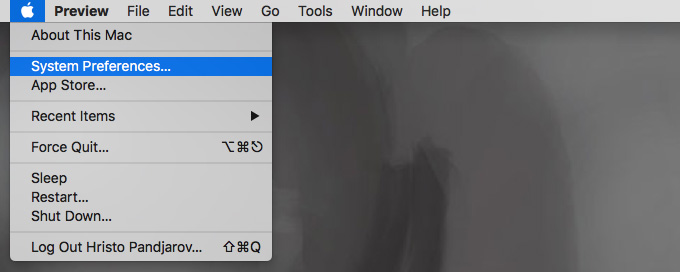
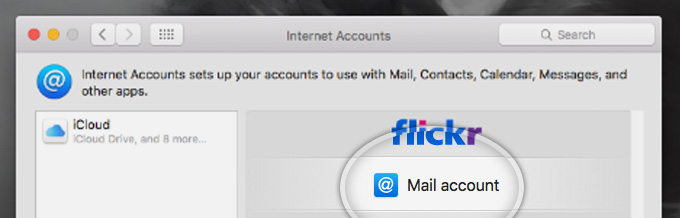
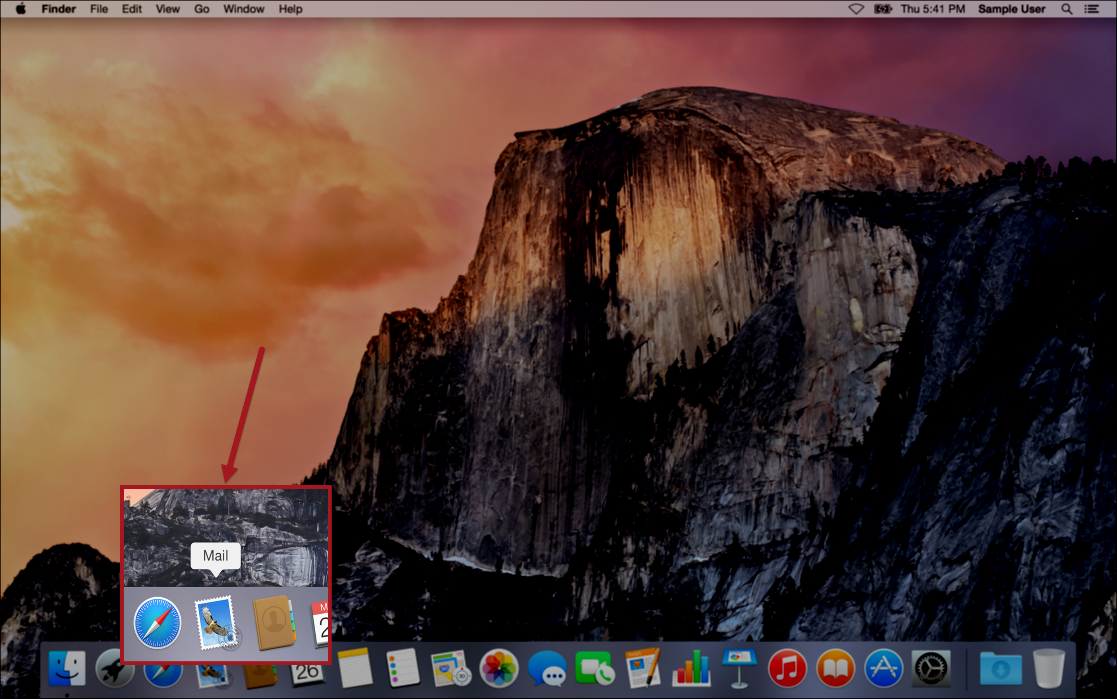
3. Desde la pantalla principal de Mac, desplace el cursor sobre la base para mostrar los iconos de la aplicación.
4. Haga clic en el icono de Correo . La Agregar cuenta aparece el cuadro de diálogo.
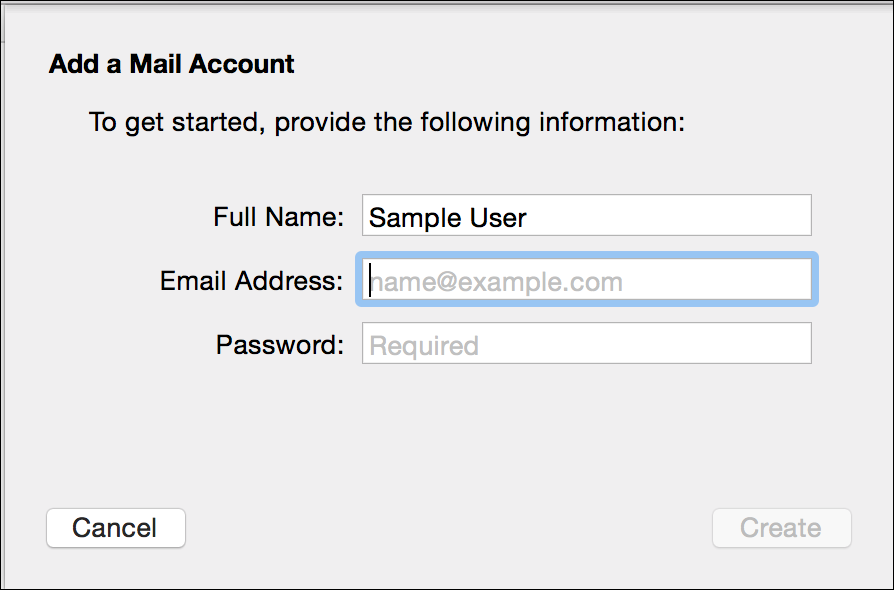
5. En el cuadro de diálogo Agregar cuenta , escriba la información adecuada en los campos correspondientes. los
Los campos incluyen:
• Nombre completo.
• Dirección de correo electrónico.
• Contraseña.
Agregar cuenta adicional
Si ya ha agregado una cuenta de correo electrónico, las instrucciones en esta sección son para agregar más cuentas de correo electrónico. Siga estas instrucciones para agregar cuentas de correo electrónico adicionales.
1. Desde la pantalla principal de Mac, desplace el cursor sobre la base para mostrar los iconos de la aplicación.
2. Haga clic en el icono de Correo . La aplicación de correo aparece.
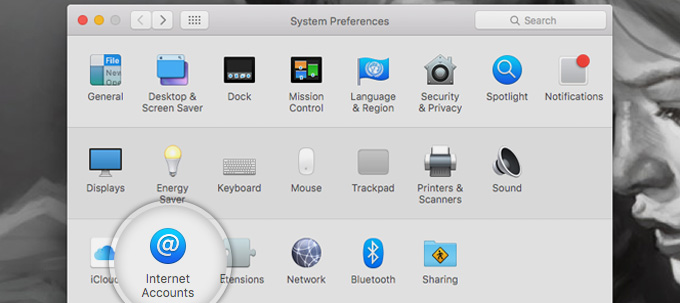
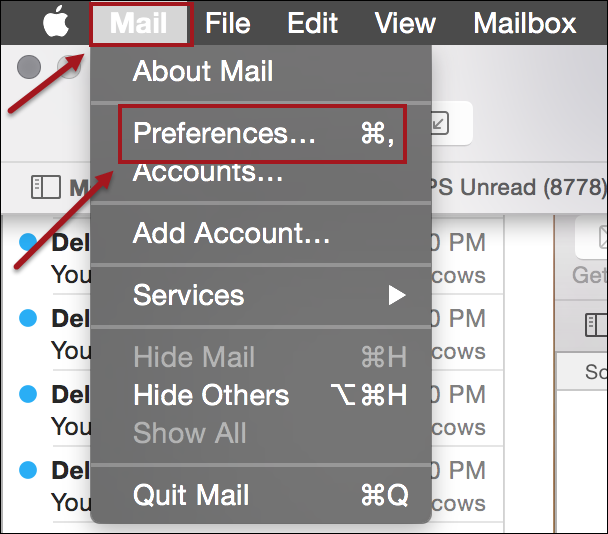
3. Desde la barra de menú, haz clic en Correo> Preferencias . El cuadro de diálogo Cuentas aparece.
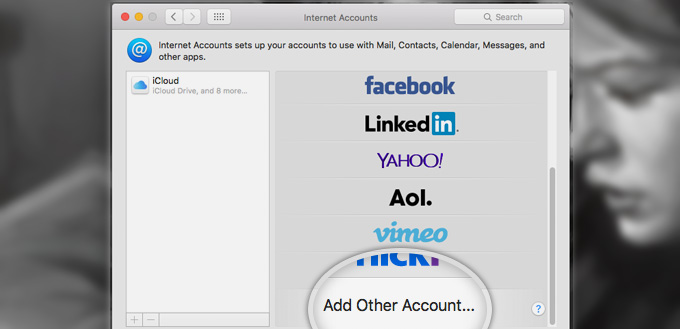
4. En el cuadro de diálogo Cuentas , haga clic en el signo más.
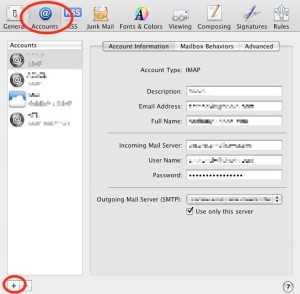
El Elegir una cuenta de correo para agregar aparece el cuadro de diálogo.
Agregar información de cuenta
Ya sea la primera vez que agrega una segunda o tercera cuenta, las indicaciones son las mismas a partir de ahora.
1. En el cuadro de diálogo Elegir una cuenta de correo para agregar , haga clic en el botón de opción Agregar otra cuenta de correo .
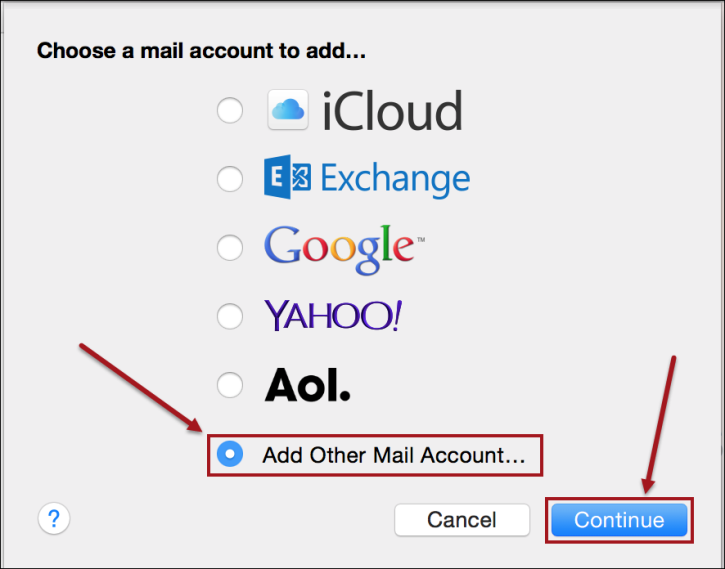
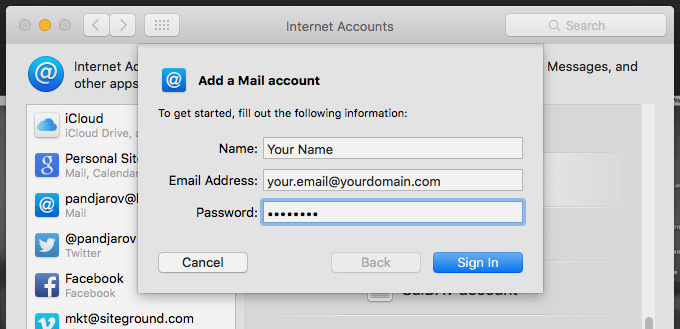
2. Haz clic en Continuar. Aparece el cuadro de diálogo Agregar una cuenta de correo. El campo Nombre completo es con su nombre completo.
3. En el cuadro de diálogo Agregar una cuenta de correo, en los campos Dirección de correo electrónico y Contraseña, escriba la información correspondiente.
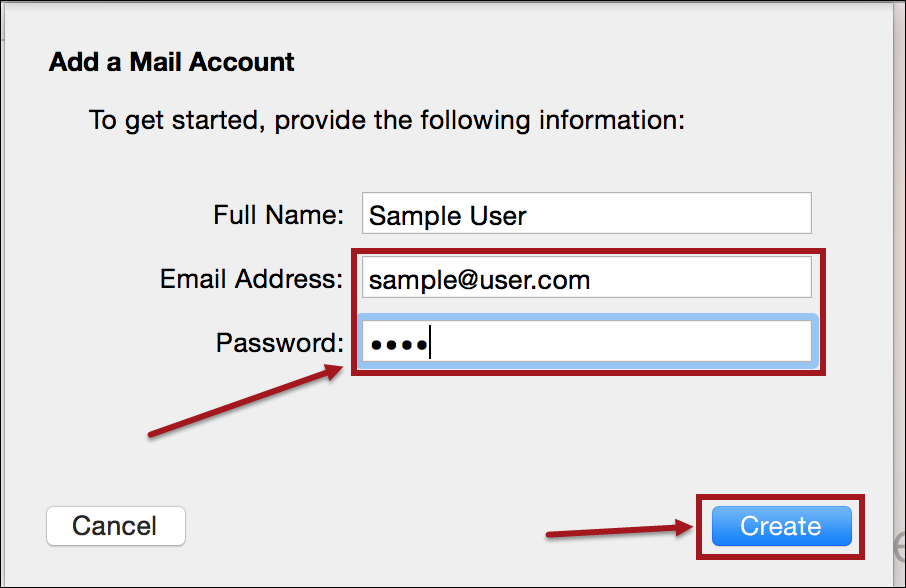
4. Haz clic en Crear. Aparece la pantalla de información del servidor de correo entrante.
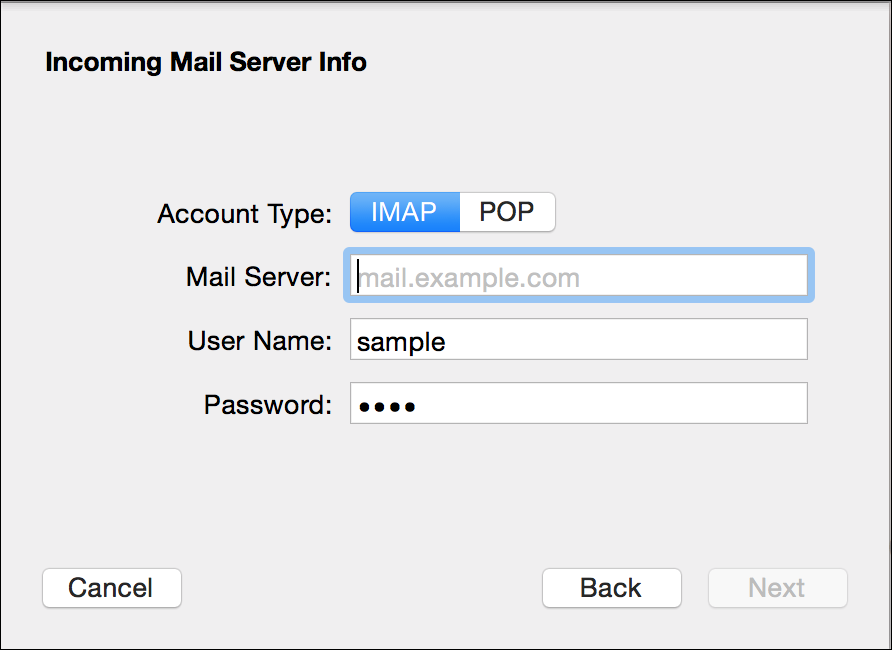
Configurar IMAP
Cuando aparece el cuadro de diálogo Información del servidor de correo entrante, los campos IMAP aparecen de manera predeterminada. Siga estas instrucciones para configurar IMAP.
1. En el campo de diálogo Servidor de correo entrante Servidor de correo, Nombre de usuario y Contraseña, escriba la información correspondiente.
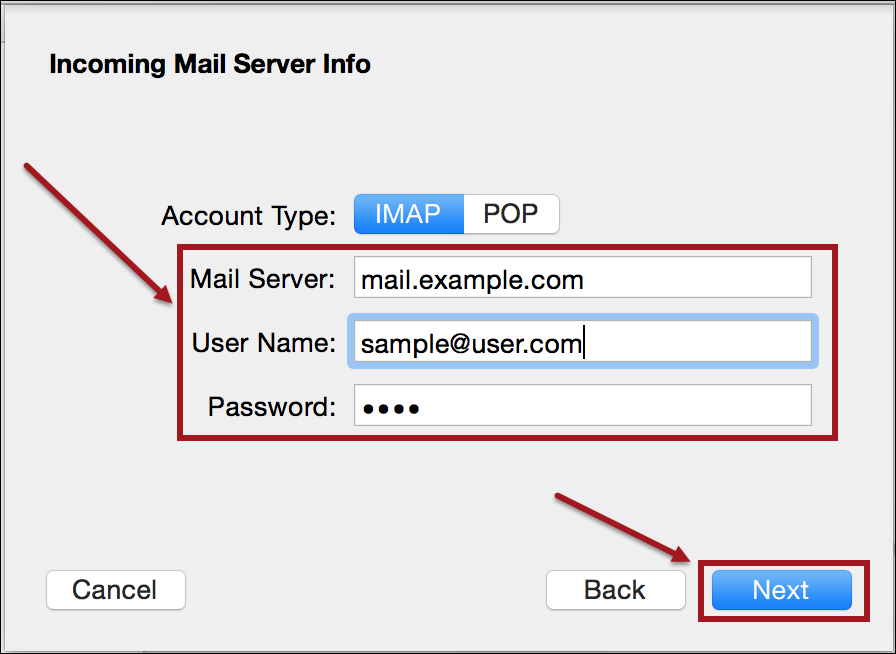
2. Haz clic en Siguiente. Aparecerá el cuadro de diálogo Información del servidor de correo saliente.
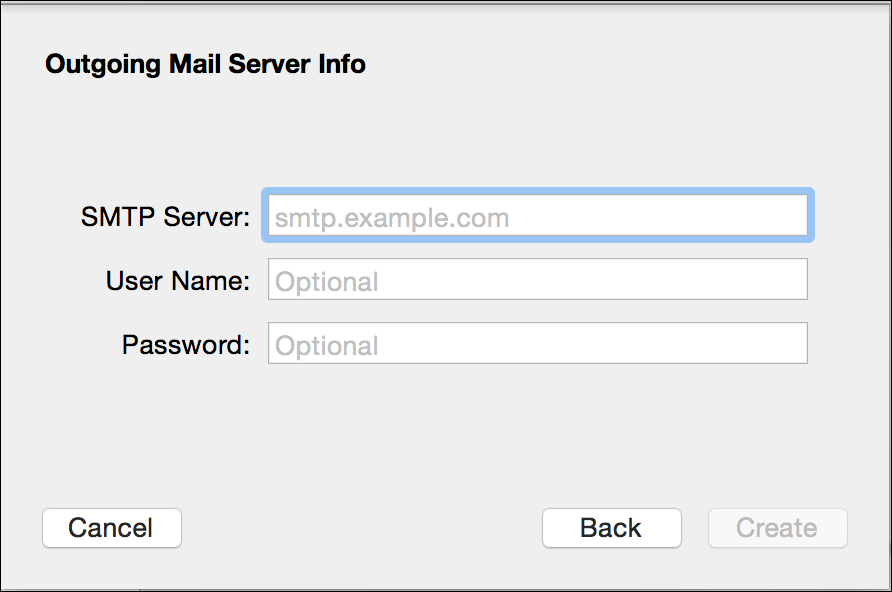
3. En el cuadro de diálogo Información del servidor de correo saliente, Servidor SMTP, Nombre de usuario y Contraseña, escriba la información correspondiente.
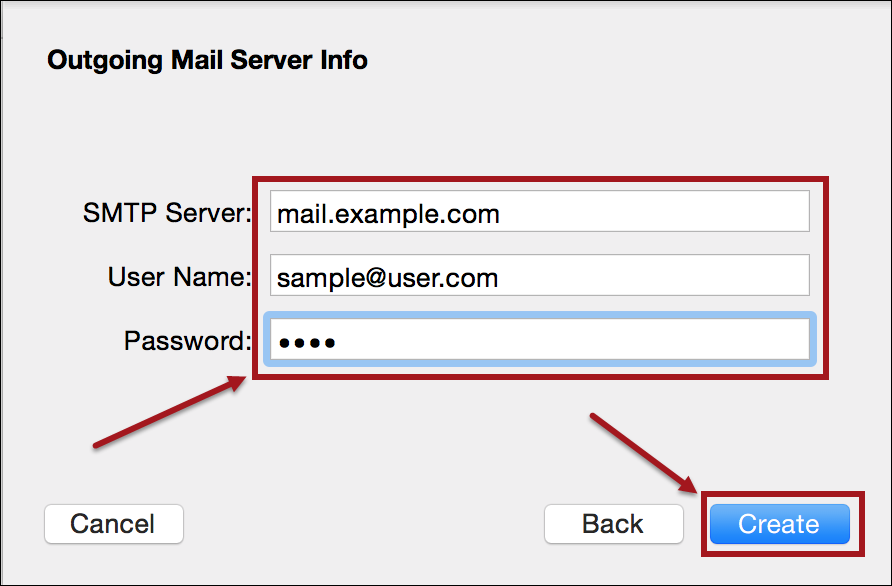
4. Haz clic en Crear. Aparecerá la bandeja de entrada y se creará la nueva cuenta de correo electrónico.